Finally putting everything together. I am going to show you 3 methods of doing this.
I will start with the easiest, then work my way up to technical details.
Import the new cage OBJ file that you exported from Zbrush.
Convert it to Sub-D, or poly smooth it twice
. |
| |
|
Method 1 : using Turtle
The easiest way that I have found was to use Turtle, the render engine for Maya. Just one click, and we are done. No need for the Photoshop step.
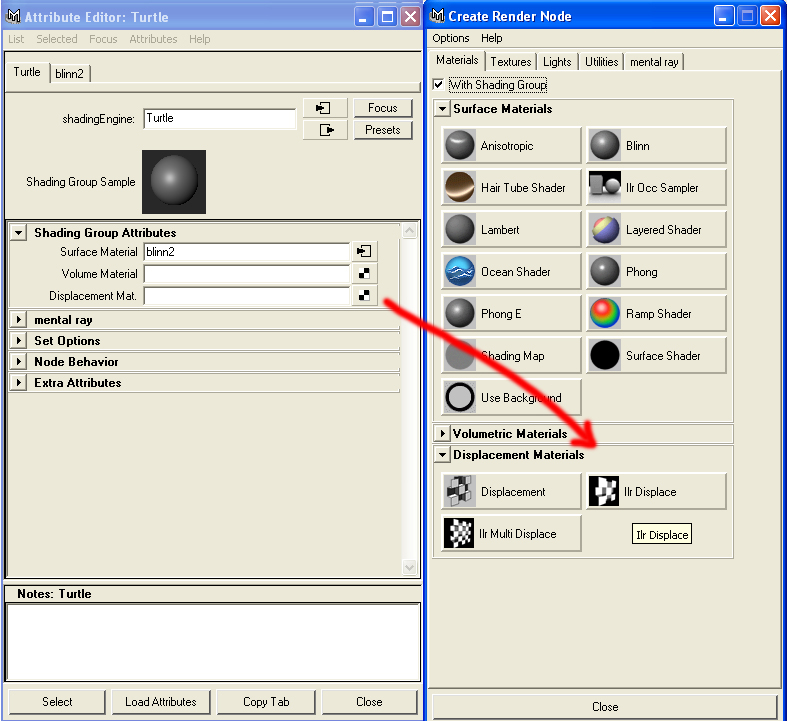
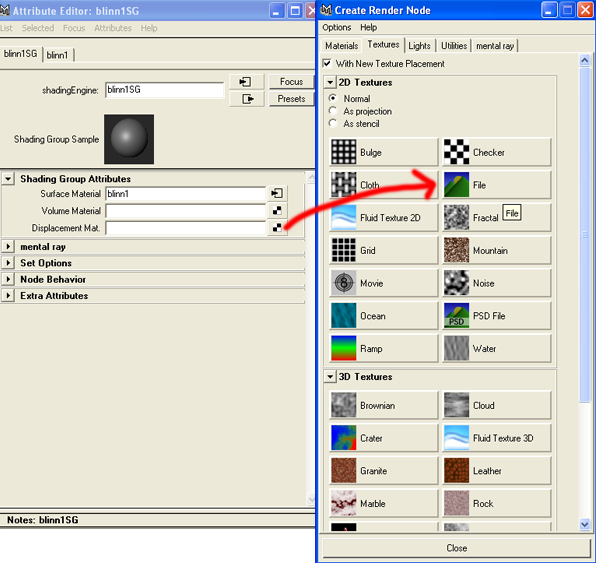
Make a new material. As for displacement, choose "ilrDisplace."
In Texture 1, pick the tiff file that was generated by Zbrush, (the original one.)
We have already flipped the image in the Zbrush stage, so there is no need to flip it here.
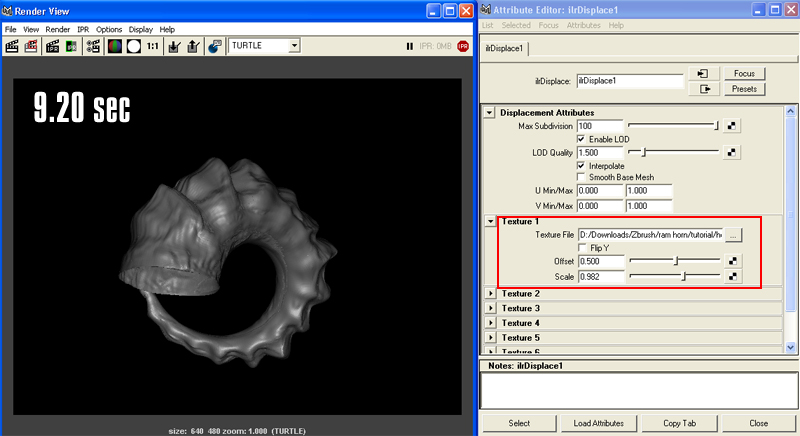
Add 0.5 to the offset, (that is the auto contrast in the Photoshop stage.)
|
| |
 |
As for the scale, I started with 0.9825, (the number we got from Zbrush as alpha gain.) You might need to rely on the art of fine tuning to adjust the parapmeters and get the desired result.
Mine looked like this , it took 9.20 sec on P4 - 3.0 GH - 1G RAM.
|
| |
 |
Method 2 : using MR "fast"
Working with our Sub-D Object, apply new material to the horn, and add displacement map to it. Choose the file 'texture2' that was generated in Photoshop ,as a displacement map.
|
| |
 |
Try to render it in MR, and you will get something weird like this. Oh my gad, we're screwed!! No...not yet! |
| |
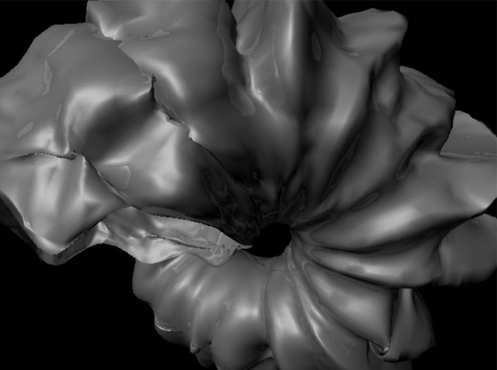 |
Now the art of fine tuning.
I would start by going to the attribute editor of the displacement map file. Go to alpha gain and put the number we got from Zbrush. Mine was 0.9825.
Divide it by 2 and place it with a minus value in the alpha offset, so now the alpha gain is 0.9825 and the alpha offset is -0.49.
So if your number was 1.0, then put "1.0" as the alpha gain and "-.05" as the alpha offset and so on. Got it?!
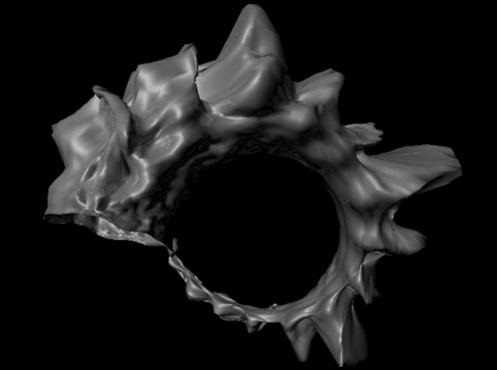
You will still get something weird, but you can see from the previous render how this is going to work. So now to the art of fine tuning.
|
| |
 |
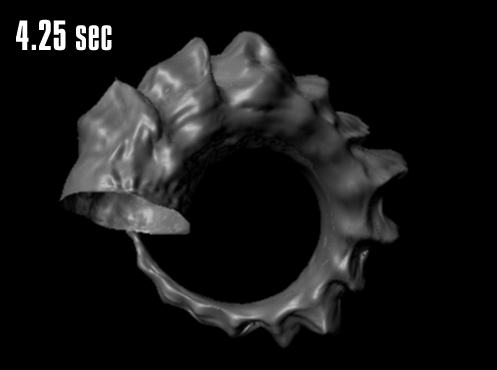
Change the alpha gain and alpha offset until you get something similar to the one you had in Zbrush.
Mine was 0.4 and -0.2.
Apply the bump map that you got from Zbrush to add the scratches on your object. I used bump depth 0.2.
|
|
 |
As for the object, go to the Att Editor and under displacement map turn off feature displacement. Under tessellation make it 4.
Note: Many Maya users will go against this, but it takes longer with it on. And when I turned it off, I didn't see any differences.
|
| |
 |
Method 3 : using MR "accurate" |
| |
We start from the very first step; import the cage OBJ file
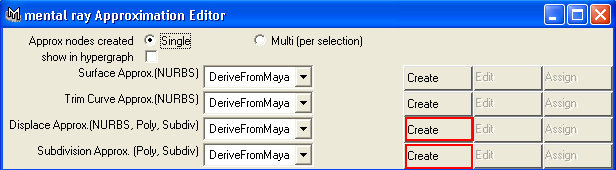
Now under Windows rendering editors mental ray approximation editor
In the approximation editor window choose
Displace Approx create
Subdivision Approx create
Note: Make sure you have the object highlighted when you do this |
| |
|
| |
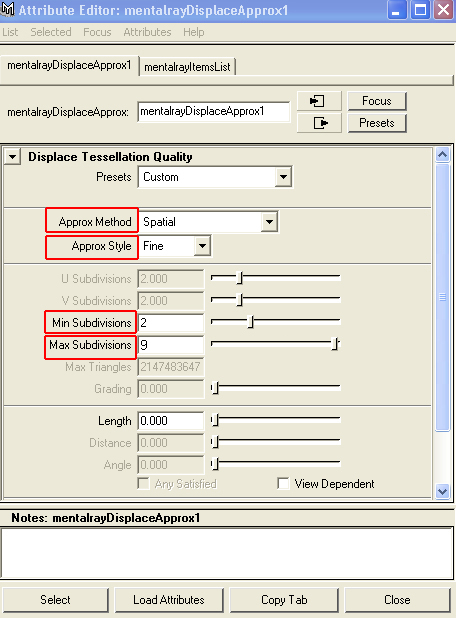
Now click on the edit for the Displace Approx
Approx method - spatial
Approx style fine
Min Subdivision 2
Max Subdivision 9 |
| |
 |
| |
In the edit for the Subdivision Approx.
Approx Method parametric
N Subdivision 5
Note: Subdivison 5 will take a long time to render. You can usually get away with 4. I'll leave that up to you. |
| |
 |
| |
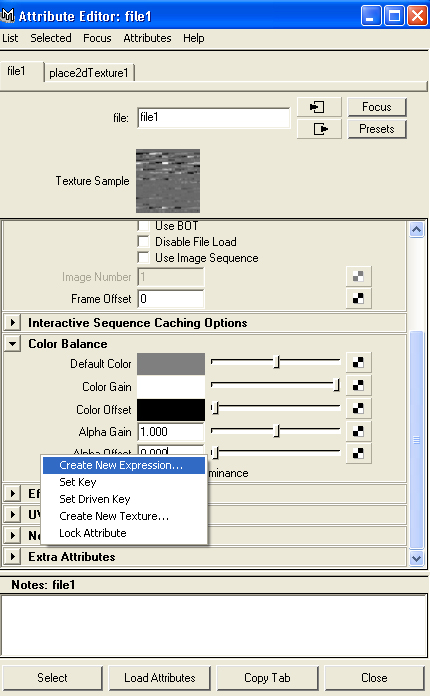
Create a material with displacement map of Photoshop file (the one that we auto contrasted.)
Go to the alpha offset, right click and choose create new expression.
Enter the following:
file1.alphaOffset = (file1.alphaGain) *-0.5;
So now we don't have to worry about the alpha gain. It will be done automatically for us. Thanks to the power of Action script. |
| |
 |
| |
In the alpha gain put 0.9825.
Here is my final render.
|
| |
 |
| |
You can turn Feature Displacment off. It will decrease your render time a little bit with no difference in the quality of the render. This will come in very handy when you have a more detailed object. |
| |
|
| |
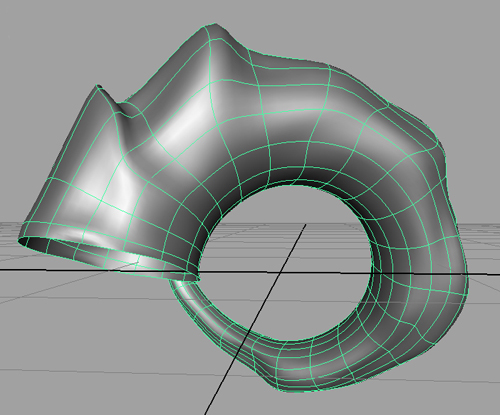
The very last thing we are going to do is close these CVs at the end of our horn. The reason I left them open like this is because I knew that when we do our sculpting in Zbrush, the CVs will be pulled away from each other.
So now we have better control over them.
Scale them to 0 and go get a drink you've done a good job :)
|
| |
|
| |
|
| |
|